This report is from Heather.
WFGA Wreath Making Workshop –
As a member of the Women’s Farm and Garden Association, one of the perks is getting a discount on their workshops. They have rose pruning, vine pruning, plant classification, and the one that I went to: wreath making. I’ve been a member for more than a year, but this is the first time I’ve taken advantage of the discount. With it being held right around the corner from my house, and being taught by Louise Bastow, my favourite local garden designer, florist, and an all around awesome person, I decided the time was right to do it.
I’ve always loved the look of natural wreaths and have contemplated making one before, but had no idea where to begin.
We started at Louise’s house and learned the ins and outs and trade secrets (wire, more wire!) of this kind of floristry.
She provided us with a beautiful and varied selection of plants to use. So many different colours and textures to choose from: blue fir, box, dogwood, ivy with and without berries, holly, holm oak, rose hips, skimmia, and eucalyptus.

Louise showing us how to make the frame. We used red dogwood, weaving and twisting it into a circle and securing it with thin, floristry wire. You can buy pre-made wire frames, but this was definitely more fun!

When done making the circle, you then pack on damp moss to keep the wreath looking fresh. After that, you choose your materials and begin assembling!
Starting to Assemble
After the demo, we started making our own. The first circle I made unintentionally had a two foot diameter and was shaped like an egg. Looking at how big and heavy they started getting once the moss and foliage was on, I took it apart and made it a more manageable size. That’s mine at the bottom- I’m always so slow!

Louise gave us a lot of one-on-one help, advising us on construction and design.
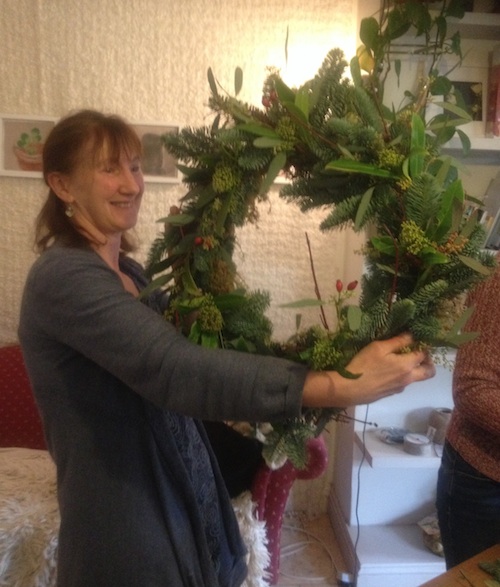
The finished products: Jane wth her beautiful wreath. I really like the eucalyptus and rose hips.
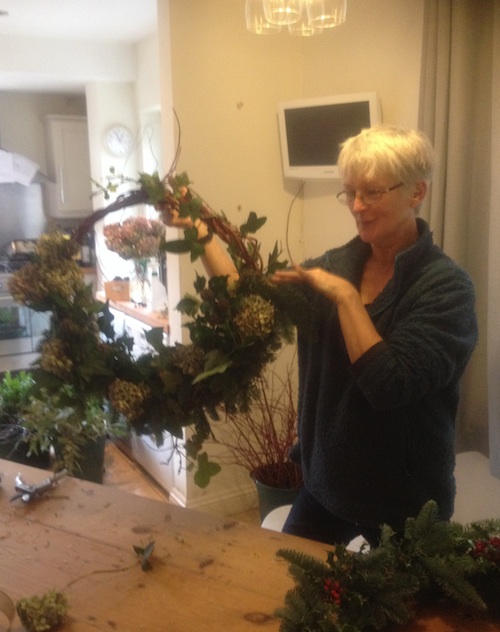
Lesley decided to weave the dogwood and leave the top exposed to show off its beautiful red colour. You can’t tell from my iphone photos, but the dried, blue flower heads of the hydrangea really popped!
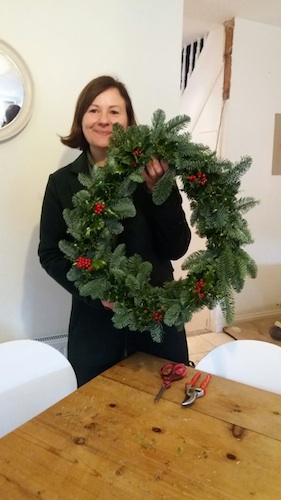
The smooth, shiny emerald green against the soft blue fir of Judith’s wreath was gorgeous. Again, sorry for the iphone quality photos, in person, you can see how the ivy berries add another dimension to her design and she plans on adding some red berries at home.

I wanted to use one of everything on mine, but after taking bits and bobs and trying to put them together, I thought simple was best. I used a ton of blue fir and braved the pain of the holly leaves to get some of those beautiful berries on mine. (photo quality much better with Judith’s phone!)
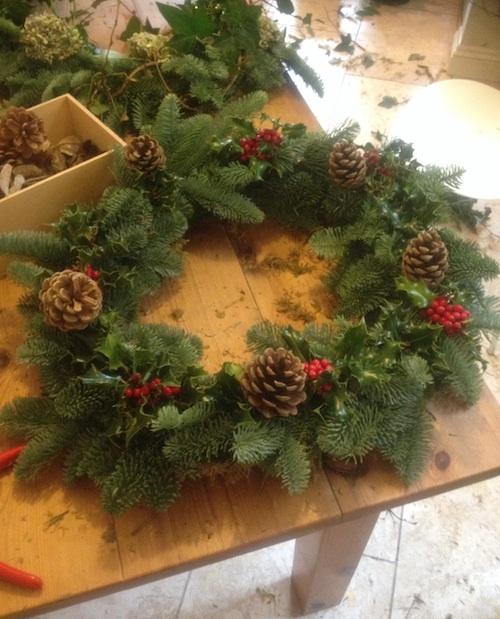
Louise gave me some wire so when I got home I attached these pine cones. I’m so in love with my wreath and now that I know how to make one will do it every year! So if you see me around the green spaces of Bristol with my secateurs next December, you’ll know what I’m up to.
Along with learning a fun new skill, it was wonderful spending the morning with these with lovely people. For more information on the WFGA and its workshops, click here.
 My Basket


